BUILDING LOGIN AND SIGNUP WITH QWIK & TAILWIND CSS(Part 1)


Hello there, in this article we are going to learn how we can build login/signup system with qwik framework.
As you might have read "Qwik is a daring rethink of how reactive UI's Work". One thing about qwik that makes it load faster is the fact that it isolates the segments of the app that are hydrated on as-needed basis.
So ladies and gentlemen without further ado let me get started.
Installation
To install run npm create qwik@latest
Add Tailwindcss
To add tailwindcss, open the directory in terminal/cmd e.g cd signupand run npm run qwik add tailwind.
Next open the folder in vscode code . or just go to vscode and open folder then select the folder from where you created it.
Find 'global.css' and add the following code in it.
   @tailwind base;
   @tailwind components;
   @tailwind utilities;
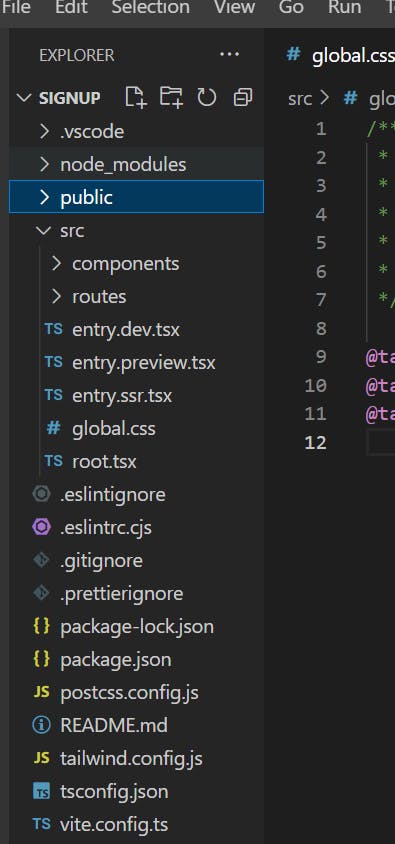
Folder Structure
The image below show how qwik is structured. We shall not be using all of them for now. We shall only focus on a few like routes, components and public
Now open the terminal and run npm run dev and see how qwik looks like.
First component
Now we are ready to write our first component.
Go to the components folder and create testcomponent.tsx
Add the following code:
on top import component$
import { component$ } from '@builder.io/qwik'After that add
export const TestComponent = component$(()=> {
return <div>Hello world. This is our Test component
})
Up until this point , we have created the component and next we are going to learn how to use it.
Using the component
To use the component we created earlier testcomponent, first go to index.tsx in the routes folder
Remove everything that is inside return function and add an <h4>Test Component</h4> so as it looks like this.
import { component$ } from '@builder.io/qwik';
import type { DocumentHead } from '@builder.io/qwik-city';

export default component$(() => {
  return <h4>Test Component

  </h4>;
});

export const head: DocumentHead = {
  title: 'Welcome to Qwik',
  meta: [
    {
      name: 'description',
      content: 'Qwik site description',
    },
  ],
};
Now to be able to use our previous component, first import it like this
import { TestComponent } from '../components/testcomponent';
Now use it in the return function like:
export default component$(() => {
  return (
    <h4>
      <TestComponent />
    </h4>
  );
});
Conclusion We have come to the end of part one of the login system series in qwik and tailwindcss.I will therefore leave you with a simple task for exercise.
Q1. Create and use a component DisplayName that display's your name.
Q2. Study routes in qwik and attempt to create login and signup pages respectively. (this will set basis for the Part 2 of the series)
With those few 'remarks' ladies and gentlemen, allow me to stop there and I will see you next time.
Before I forget, you can access private lessons here: fiverr.com/share/GKYGb3
Thank you, see you in part 2